Setting Up DigitalOcean Spaces
Before you can use DigitalOcean Spaces with Media Cloud, you’ll first need to go through some basic steps to get going. Thankfully, DigitalOcean is the easiest to setup of the major cloud storage providers. However, there are a few gotchas, so if you follow this guide you’ll have everything up and running correctly very quickly.
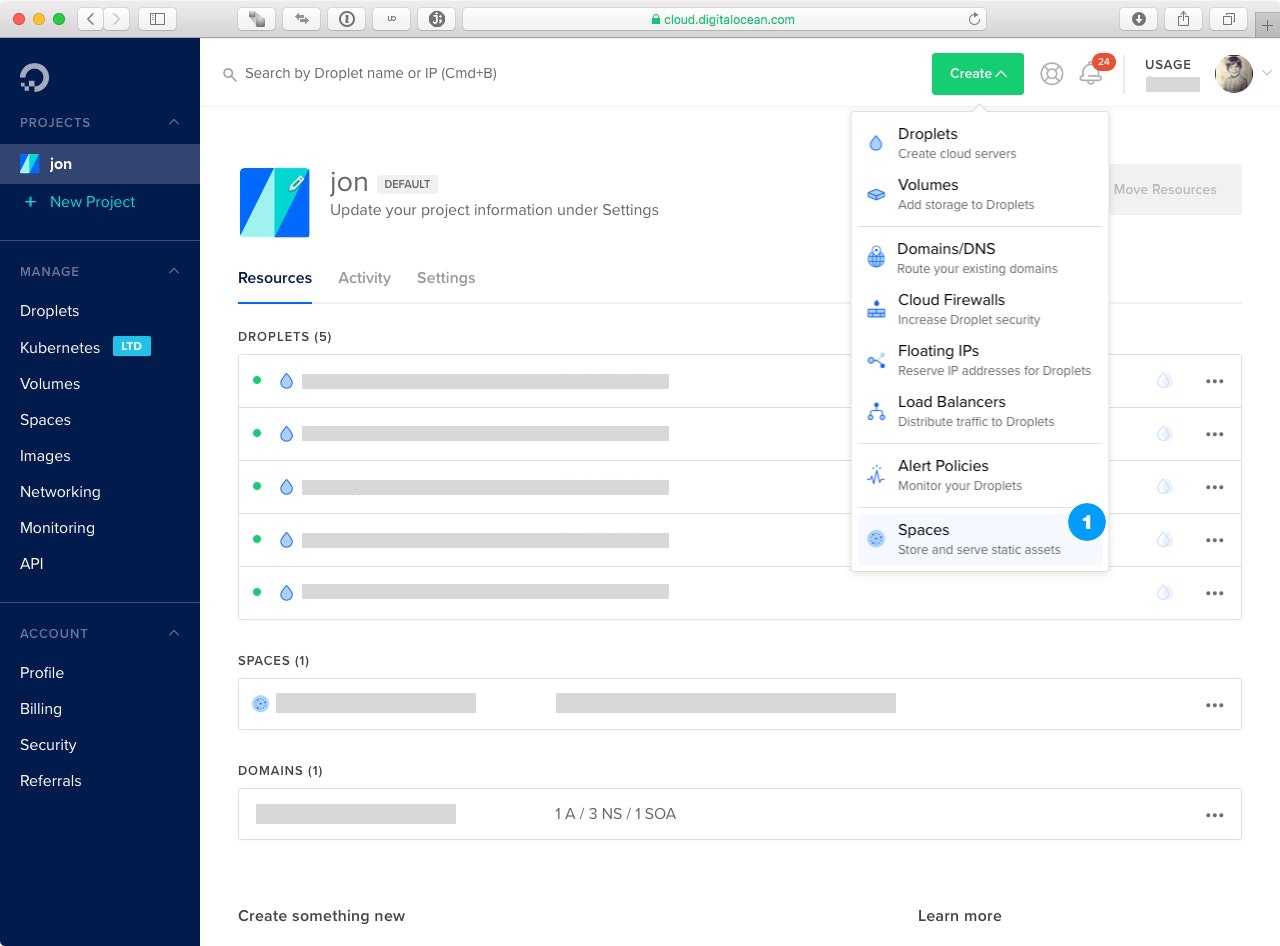
Step 1 – Create Space
Log into your DigitalOcean account and from the Create drop-down, select Spaces.
Step 1.1 – Configuring the Space
On the next screen you’ll have various options you’ll need to set to propertly configure your space.
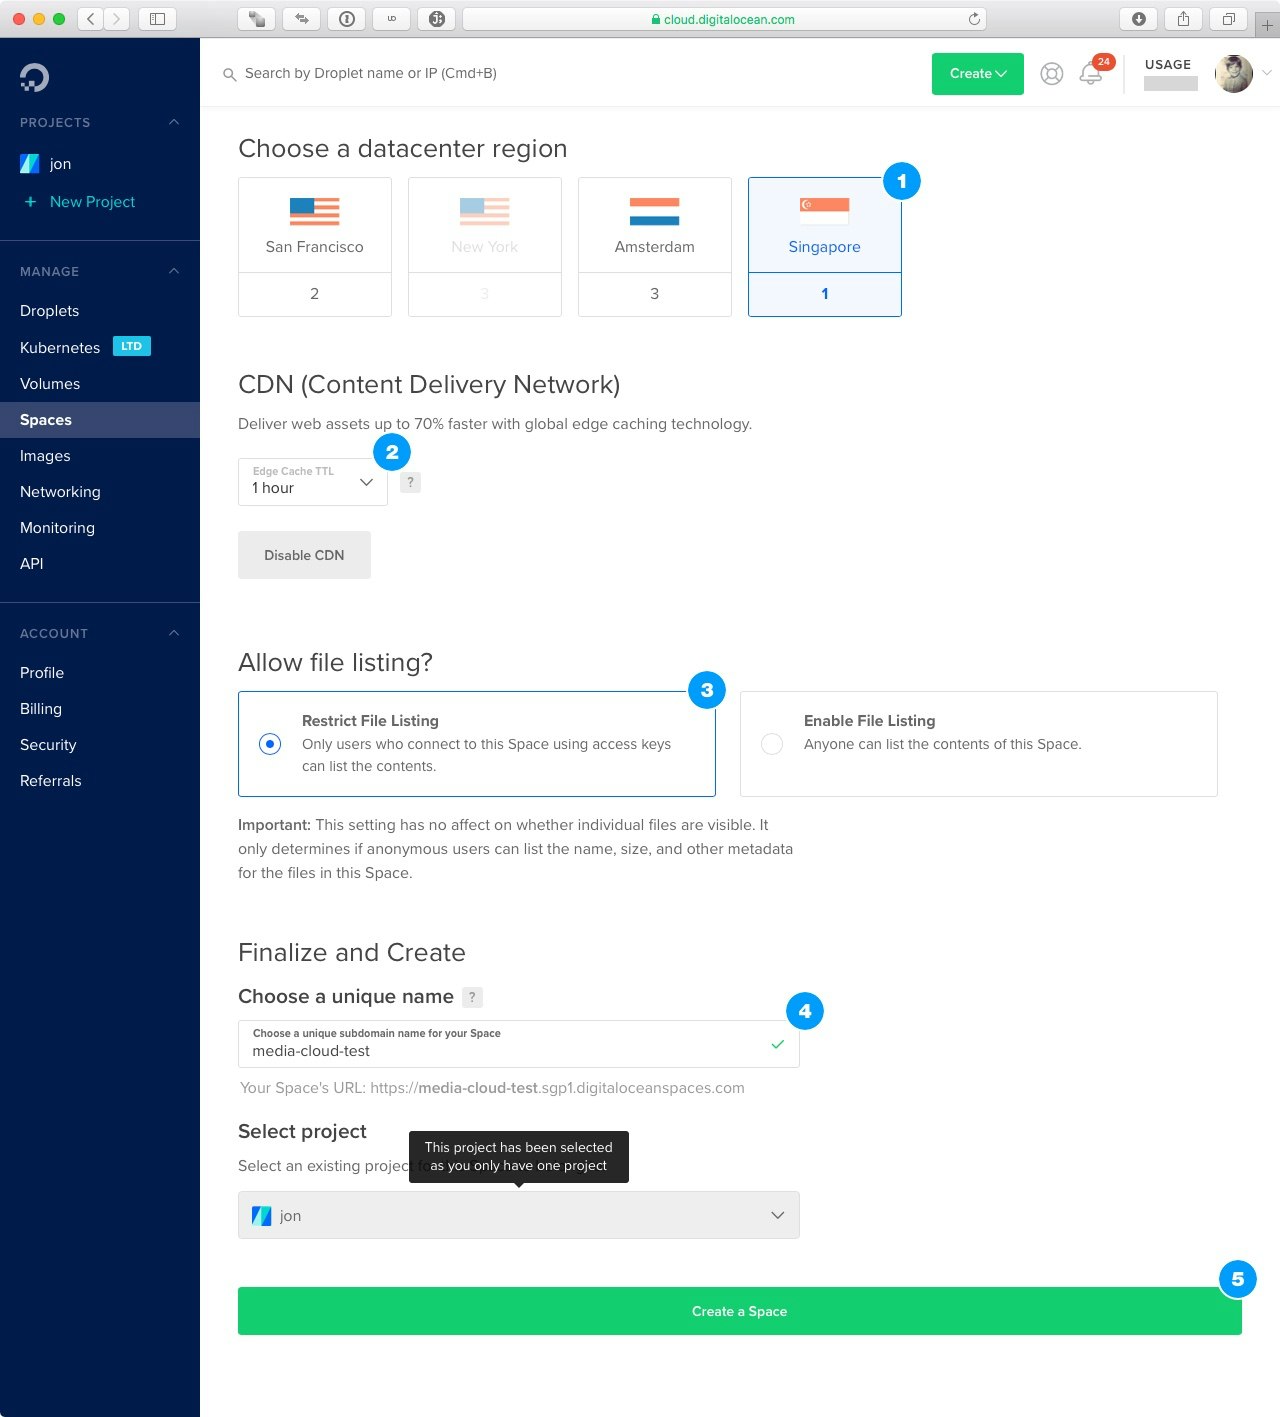
In the Choose a datacenter region you’ll want to select a region closest to you (if using Direct Upload functionality) or closest to where your servers are geographically hosted. If you are hosting with DigitalOcean, then you’ll likely select the same datacenter as your servers, if Spaces is available at that datacenter. You should enabled the CDN and select a cache timing that works best for your situation. You should enable Restrict File Listing to prevent people from listing the contents of your Space. Finally, give the Space a name and click Create a Space
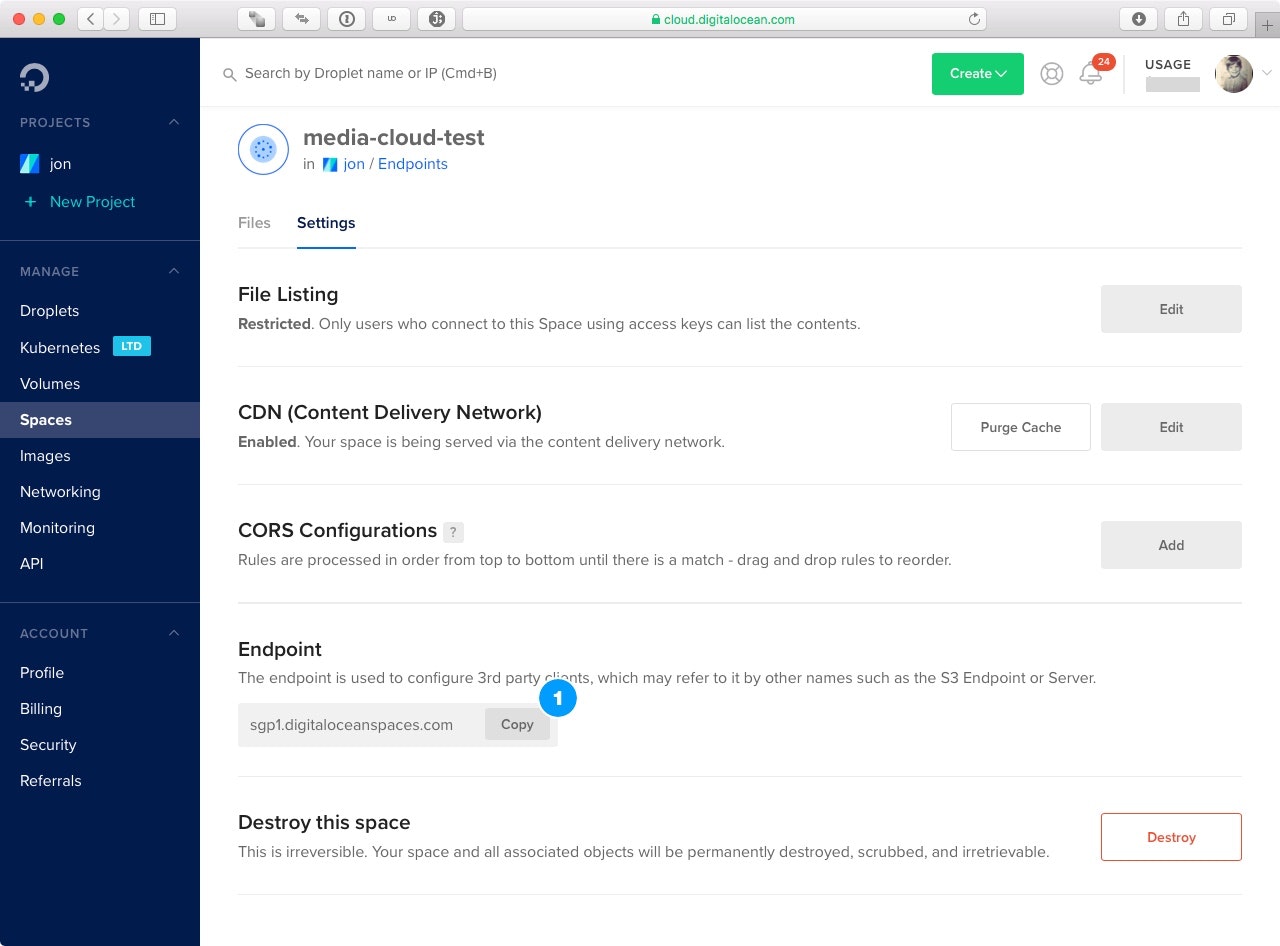
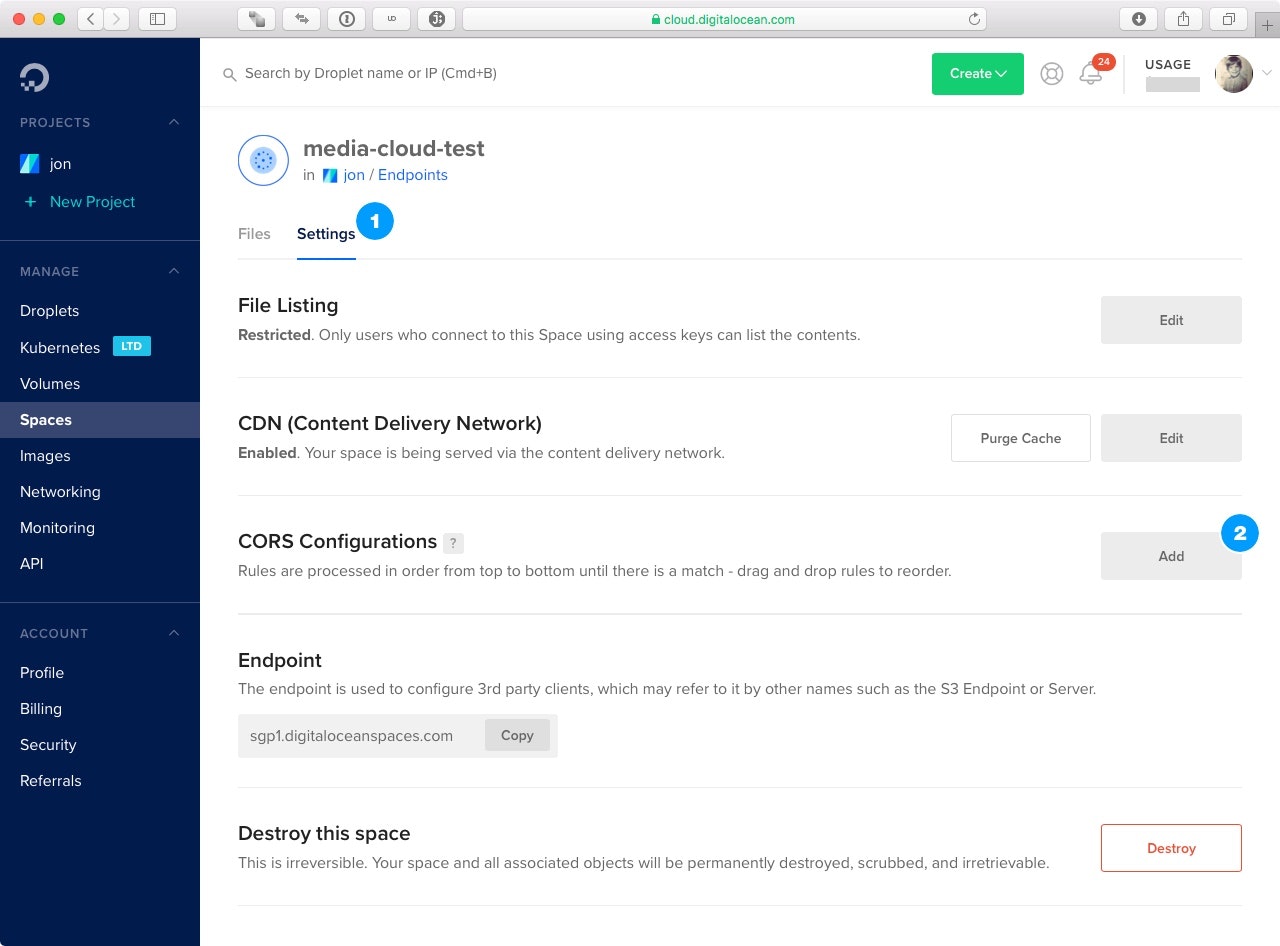
Step 1.2 – Determining the Endpoint
Media Cloud needs to know the endpoint for your Space for it to work properly. After you’ve created your space, click on the Settings tab and look for the Endpoint section. Make note of this value as we will be using it later when setting up Media Cloud.
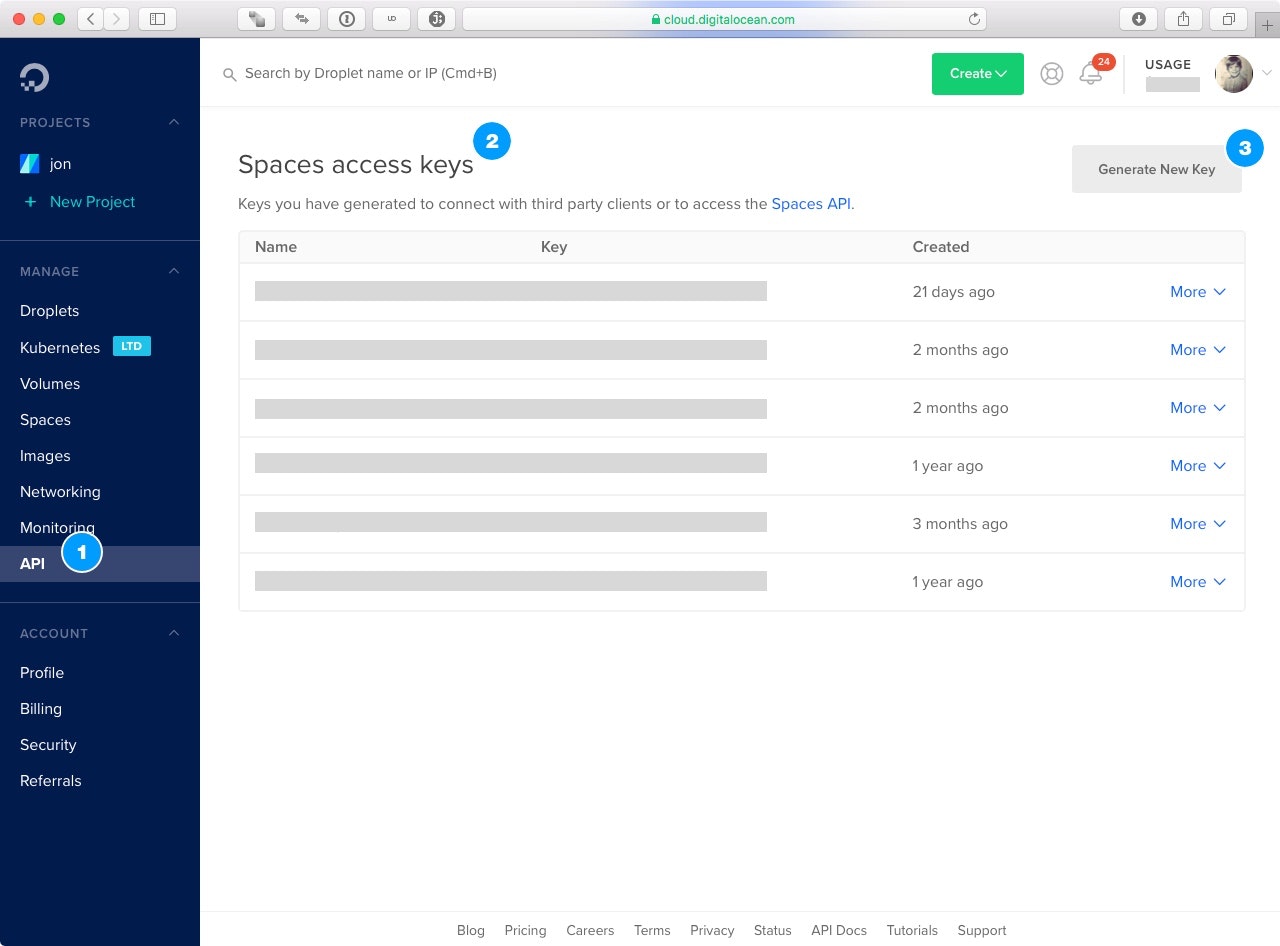
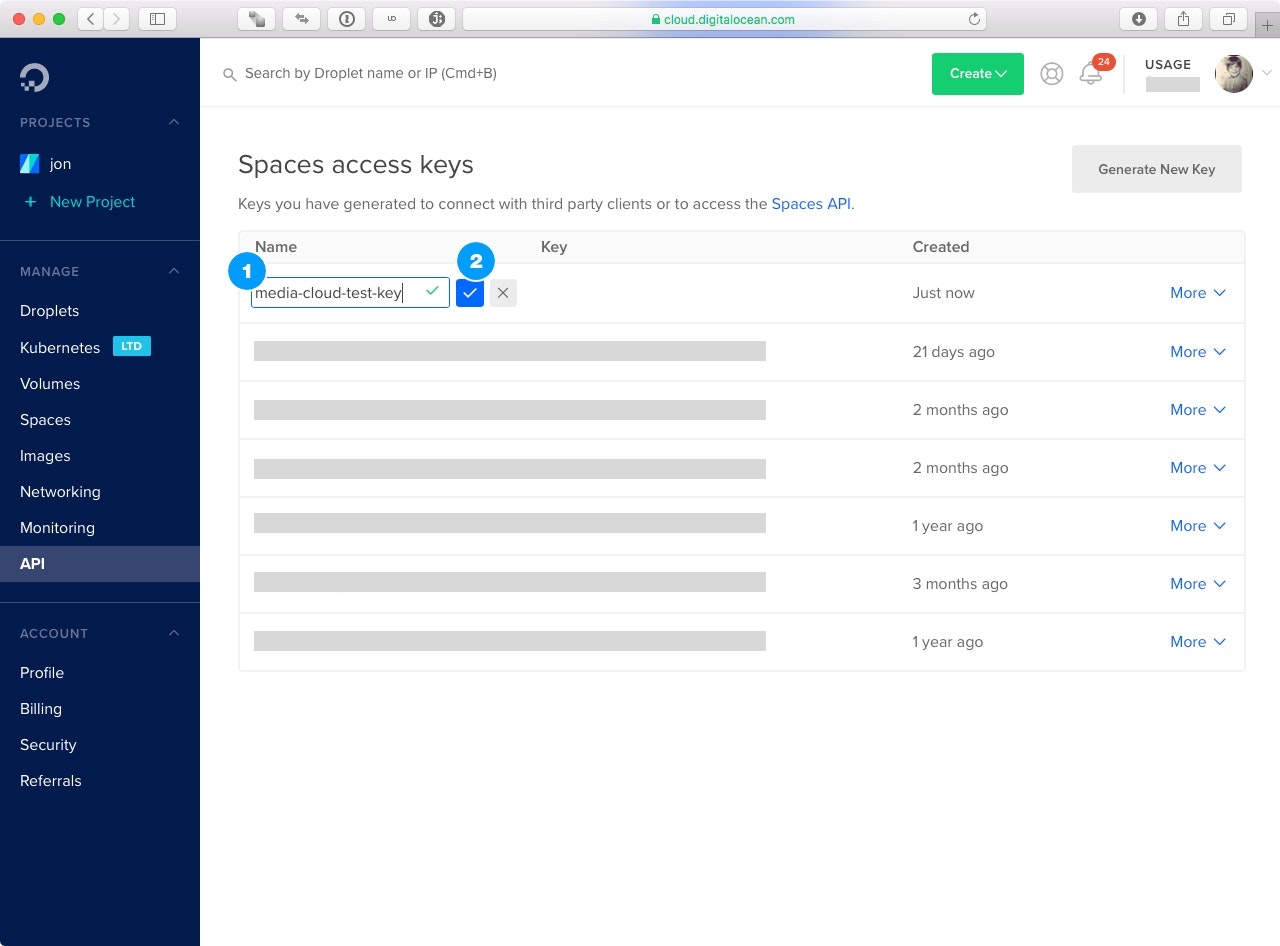
Step 2 – Create API Key
We’ll need to generate an API Key so that Media Cloud can access the Space. Navigate to the API section, scroll down to Space access keys and click on Generate New Key.
Step 2.1 – Key Properties
Once you click Generate New Key, you’ll need to give the key a name and click on the checkmark next to it.
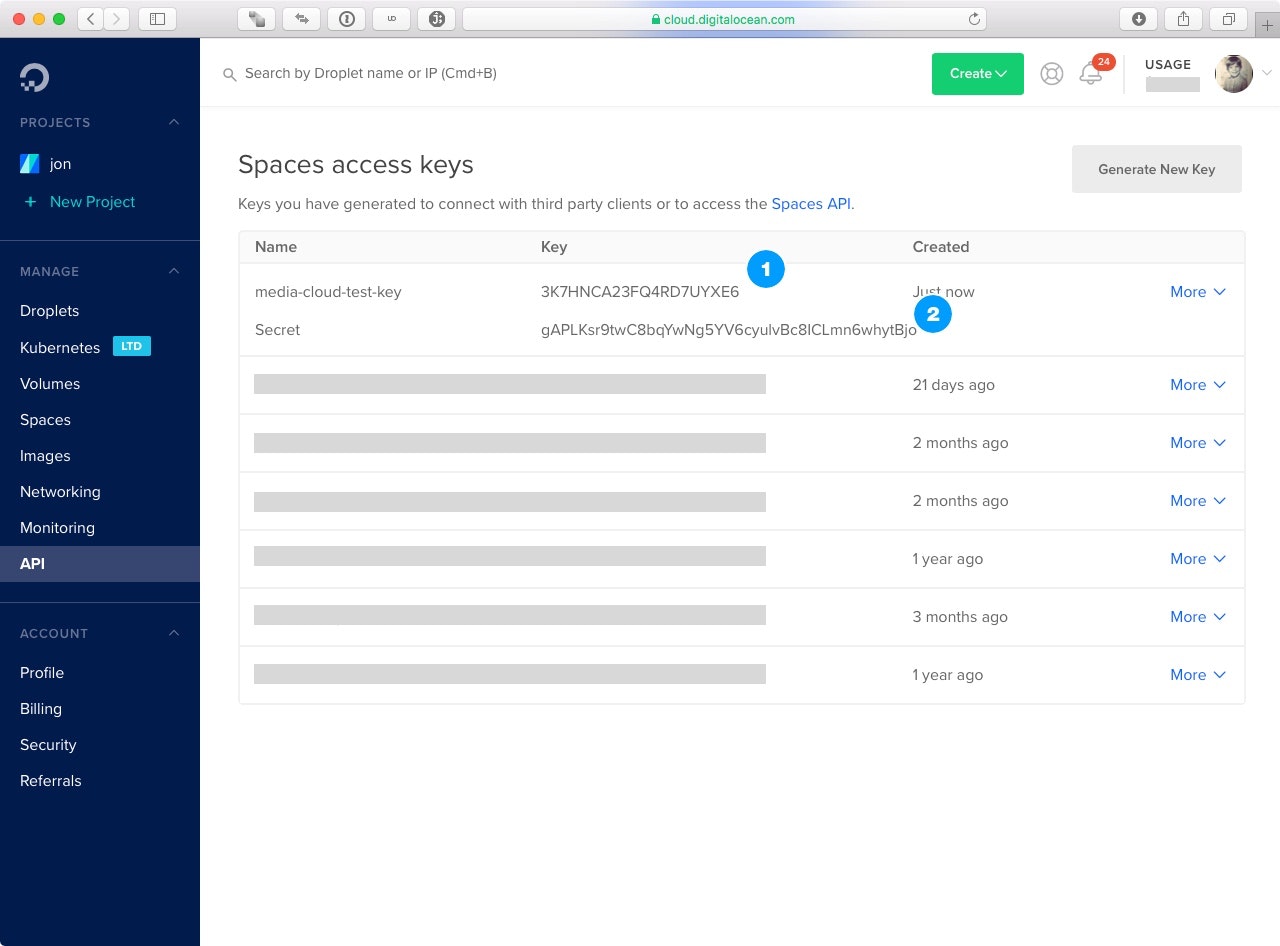
DigitalOcean will then generate a new key and display it to you. It will only display this to you once, so you should copy down the Key and the Secret now as we will be using it later.
Step 3 – CORS Configuration (Optional)
If you intend to use Direct Upload, you’ll need to configure CORS on your Space to allow it. Navigate to your Space, click on the Settings tab and then click on the Addbutton in the CORS Configurations section.
Step 3.1 – CORS Properties
In the pop-up dialog, you’ll need to specify the following: – For the Origin, enter in the base URL for your site here. If you have a development and/or staging environment, you’ll create separate CORS configurations for each.
- For Allowed Methods, check the checkboxes for GET, PUT, POST and HEAD. DELETE is optional but not needed for Direct Uploads.
- For Allowed Headers, set this to
*
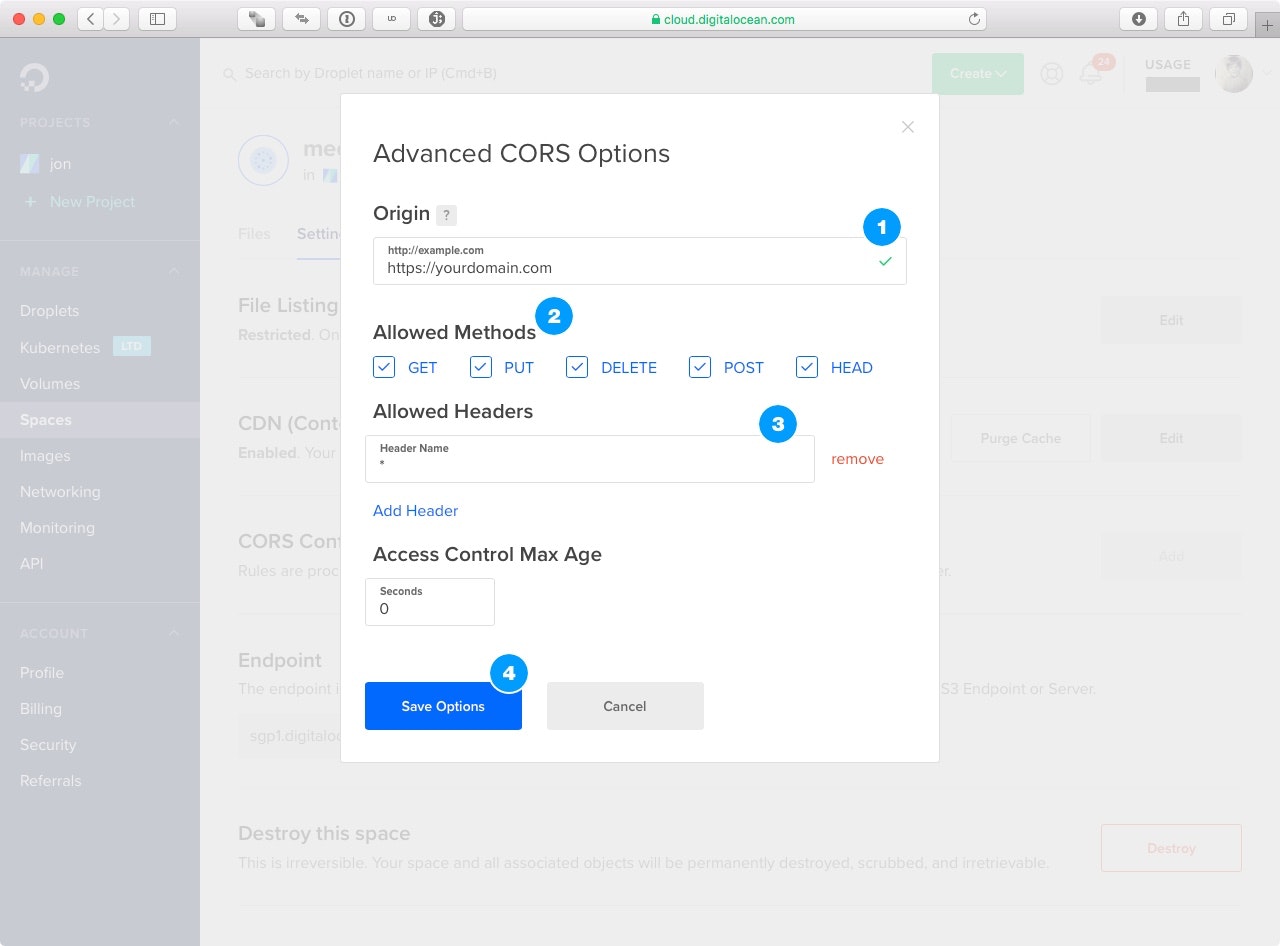
Click on Save Options to save this configuration. Repeat this procedure for your development and staging environments.
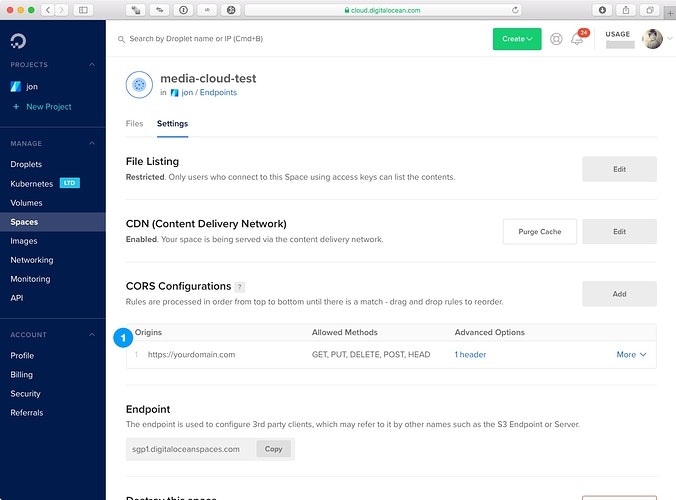
Step 3.2 – Verify CORS
After you’ve saved the options, verify that the CORS Configuration is set and correct.
Step 4 – Configure Media Cloud
Now that everything has been set up, it’s time to set up Media Cloud. Navigate to Settings in the Media Cloud admin menu and select Cloud Storage.
Step 4.1 – Provider Settings
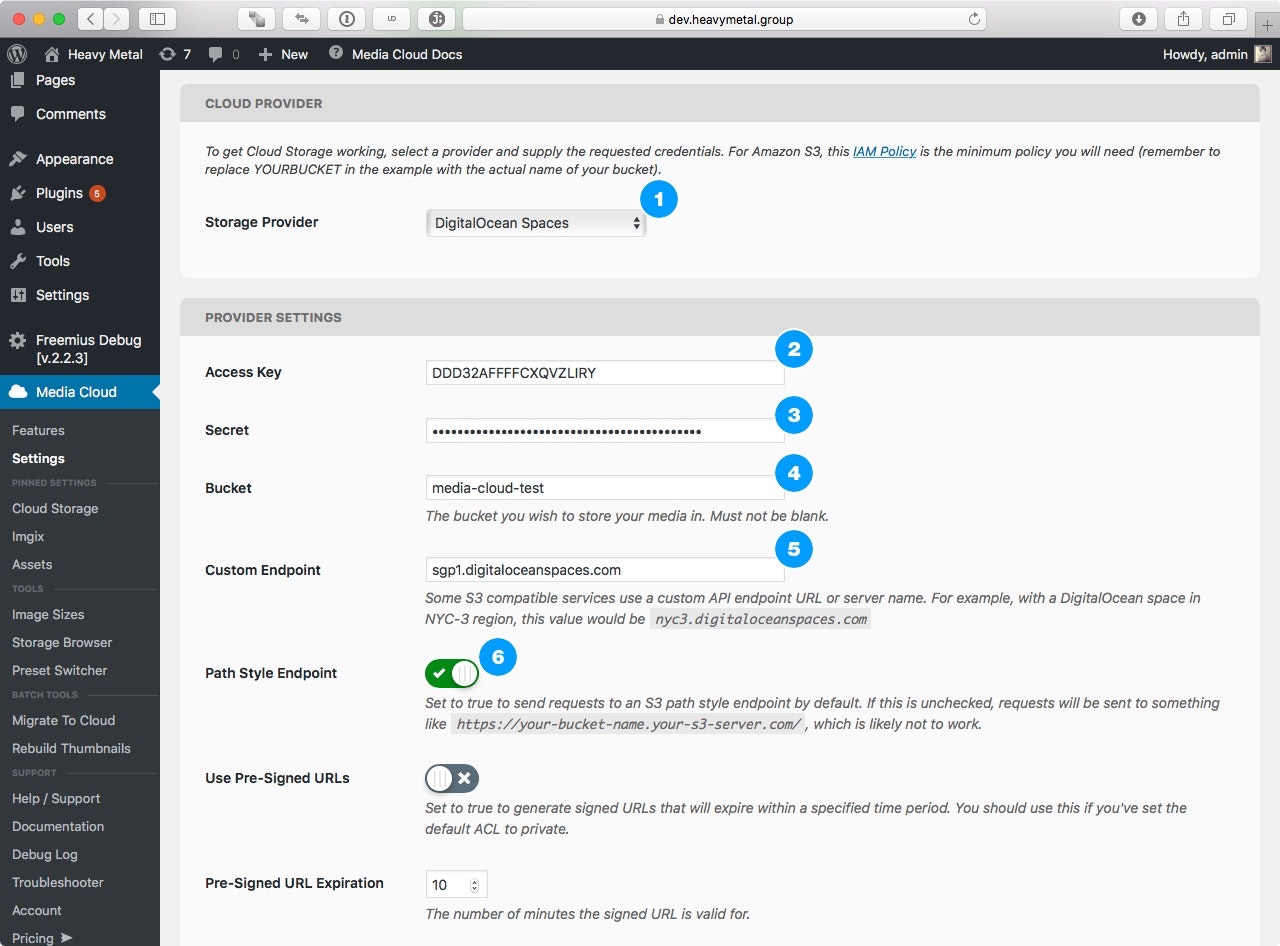
In the Provider panel, set the Storage Provider to DigitalOcean Spaces. – In Access Key enter the key we generated in Step 2.1
- In Secret enter the secret we generated in Step 2.1
- For Bucket enter the name of the Space
- For Custom Endpoint enter the value we copied down in Step 1.2
- Make sure the Path Style Endpoint is ON
At this point, these are the basic settings you need to get DigitalOcean Spaces working with Media Cloud. Save the settings and run the Troubleshooter to verify that everything is working correctly.